Planning a Victorian-themed wedding means every paper detail should feel intentional. A font pairing worksheet for Victorian era wedding stationery takes the guesswork out of typography. Instead of scrolling through hundreds of typefaces and hoping two look nice together, you get a structured way to test readability, contrast, and period accuracy before you commit to print. This matters because 19th century design relies on specific typographic rules. The wrong combination can make an invitation look cluttered or historically off, while a well-tested pair sets a refined tone from the first glance.
What exactly is a font pairing worksheet for Victorian wedding stationery?
Think of it as a printable or digital testing grid. You paste your actual invitation text into designated boxes, then swap different serif, script, and engraved options to see how they interact. The worksheet tracks size, weight, line spacing, and hierarchy so you can compare combinations side by side. It keeps you focused on vintage lettering styles instead of drifting into modern minimalist fonts that clash with lace motifs, wax seals, or heavy cotton paper.
When should you use a typography worksheet during the design process?
Pull out the worksheet after you have your paper size, layout, and color palette locked in. Typography should support the design, not fight it. If you are still deciding between a folded card or a flat panel, wait. Once the structure is set, use the sheet to map out your primary heading, secondary details, and body text. This is also the right time to check how your chosen typefaces handle special characters like ampersands, ordinals, and formal date formats. If you need a starting point for period-accurate combinations, this breakdown of vintage lettering combinations shows how designers balance decorative scripts with grounded serifs.
Which Victorian-era typefaces work best together?
Victorian stationery typically pairs a high-contrast serif with a flowing script or a restrained engraved style. Start with a strong heading font like Playfair Display for names and ceremony titles. Match it with a lighter script such as Pinyon Script for accents, then use a highly readable serif like Cormorant Garamond for addresses and reception details. The worksheet helps you verify that the script does not overpower the serif and that line heights remain comfortable. If your theme leans toward darker, more dramatic vintage aesthetics, you might explore how gothic lettering adapts to formal invitations without sacrificing legibility.
What are the most common font pairing mistakes on vintage invitations?
Designers and DIY couples usually run into three problems. First, they pick two decorative fonts that compete for attention. Second, they shrink script text below 12 points, making it unreadable once printed. Third, they ignore x-height differences, which causes misaligned baselines and awkward gaps. A font pairing worksheet for Victorian era wedding stationery catches these issues early by forcing you to print test strips at actual size. You will spot cramped spacing, clashing stroke weights, and poor contrast before ordering expensive paper. For couples mixing eras, it also helps to understand how geometric calligraphy styles interact with traditional layouts so you do not accidentally create a disjointed look.
How do you test your combinations before printing?
Print your worksheet on the exact paper stock you plan to use. Ink spreads differently on textured cardstock, and thin script lines can disappear or bleed. Check readability at arm length, then hold it under warm and cool lighting. Verify that uppercase letters in your heading font do not clash with swash capitals in your script. Run a quick hierarchy test: can a guest instantly find the date, time, and location without squinting? If the answer is no, adjust the size gap between your primary and secondary fonts. A difference of 4 to 6 points usually creates clear separation without looking disjointed.
What should you do next to finalize your stationery set?
Once your worksheet shows a clean, readable pair, lock the settings and build a master style sheet. Record the font names, sizes, weights, tracking, and line spacing for every element across your invite, RSVP, details card, and envelopes. Consistency matters more than adding extra typefaces. Stick to two fonts, three at most, and reuse the same hierarchy throughout the entire suite. Order a single proof from your printer before approving the full run. Check edge trimming, ink density, and alignment one last time.
Use this quick checklist before sending your files to print:
- Confirm both fonts support all required characters, including accents and special symbols
- Print a full-size test on your final paper stock and check readability in natural light
- Ensure script text stays at 12 points or larger for body details
- Verify a clear size hierarchy between names, date, venue, and small print
- Save a PDF with embedded fonts and include a printed reference sheet for your vendor
Run through these steps, adjust anything that feels cramped or unclear, and your Victorian wedding stationery will look polished, period-appropriate, and easy for guests to read.
Try It Free Gothic Lettering for Vintage Wedding Invitations
 Vintage Ornamental Cursive Meets Classic Serif Pairings
 Elegant Script and Serif Font Pairings of the 1920s
 Modern Minimalist Wedding Invitation Font Combinations Guide
 Selecting Fonts for a Minimalist Wedding Invitation Suite
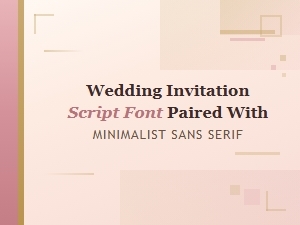 Script Font & Sans Serif Minimalist Wedding Invitation Pairing